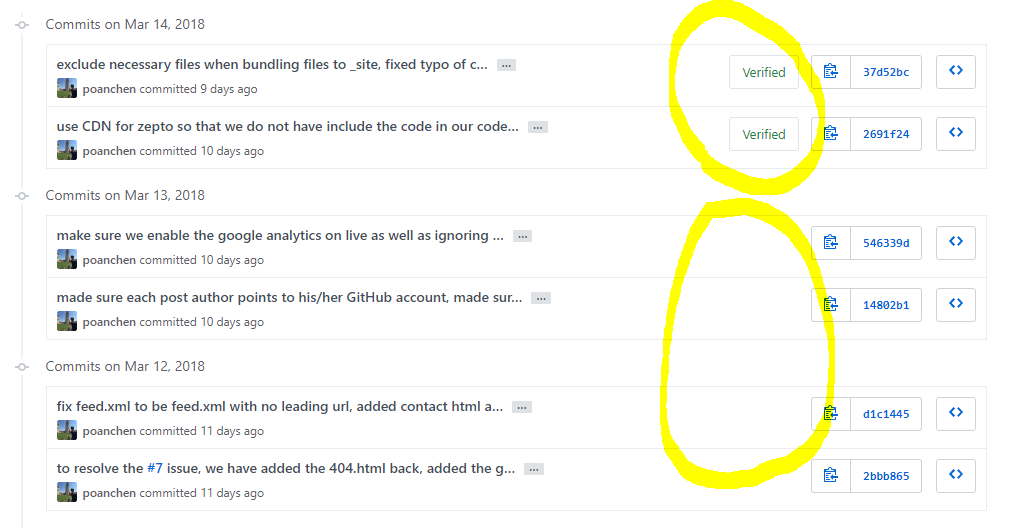
Setting up GPG keys on GitHub is important because it allows other to know that you made the commit and not someone else. You, the person with your GitHub profile picture along with your GitHub username and name. Here is an example of a signing commit looks like on GitHub.

Just like the blog from GitHub mentioned, unlike any other unsigned commit. The signed commit will come with the green word Verified with it (a badge) to indicate that the commit was indeed came from the user. In example,

In this tutorial, I am going to guide you through into setting up the GPG key on your local machine for GitHub.
Note: In case you do not have GPG command line tool installed on your local machine, please head over to here to download its latest binary releases. (I downloaded the Gpg4win from the site since I am currently using Windows 10) Once it is downloaded and installed, make sure to set up your GPG command line tool PATH in your environment variables. So that, when you type gpg on command line or Git Bash, it will work!
The first step is to check if there exist any GPG keys on your machine, if not, skip these steps, and get straight to generating a new GPG keys.
Check if there exist any GPG keys on your machine
Run the following command to check all existing public and private GPG key in your machine.
gpg --list-secret-keys --keyid-format LONGIf there were no output or you didn’t wish to use any of these available key for signing the commit, carry on to the tutorial.
If there were existing GPG key pair and you want to use them as you sign your commit, then simply skip generate a new GPG keys and get straight to adding GPG key to your GitHub account.
Generate a new GPG keys
Follow the GitHub official blog about generating a new GPG key.
Add GPG key to your GitHub account
Follow the GitHub official blog about adding a new GPG key to your GitHub account.
Git client configuration for the GPG key
In order to use the GPG key that you just created, you need to let the Git client know that from now on, you will be using this GPG key to sign your commit on GitHub. Here is what you needed to do,
  git config --global user.signingKey {REPLACE_THIS_WITH_YOUR_KEY_ID}
  git config --global commit.gpgSign true
In case you do not know what your key id is, run the following command to find out, gpg –list-public-keys
Now, you should be able to git commit with -S and the verified badge should now appear on your GitHub commit!
Wrapping Up
Hopefully you enjoyed this short tutorial. Let me know if this helps you. Thank you for reading!
Resources
I’ll try to keep this list current and up to date. If you know of a great resource you’d like to share or notice a broken link, please let us know.

Comments